
This is a guest blog post by Steve Kuhl of Radiant Solutions Company. Part 3 of 3.
Welcome to the final entry in my three-part series on ice dam prevention and heat cables. In part one, Should you install heat cables to prevent ice dams?, I discussed the most common solutions employed to prevent ice dams. In part two, Not all heat cable is created equal, I geeked out on the topic of heat cable types in depth. Today I will describe how to best employ heat cables on your home to prevent damage from ice dams.
Where To Install Heat Cables
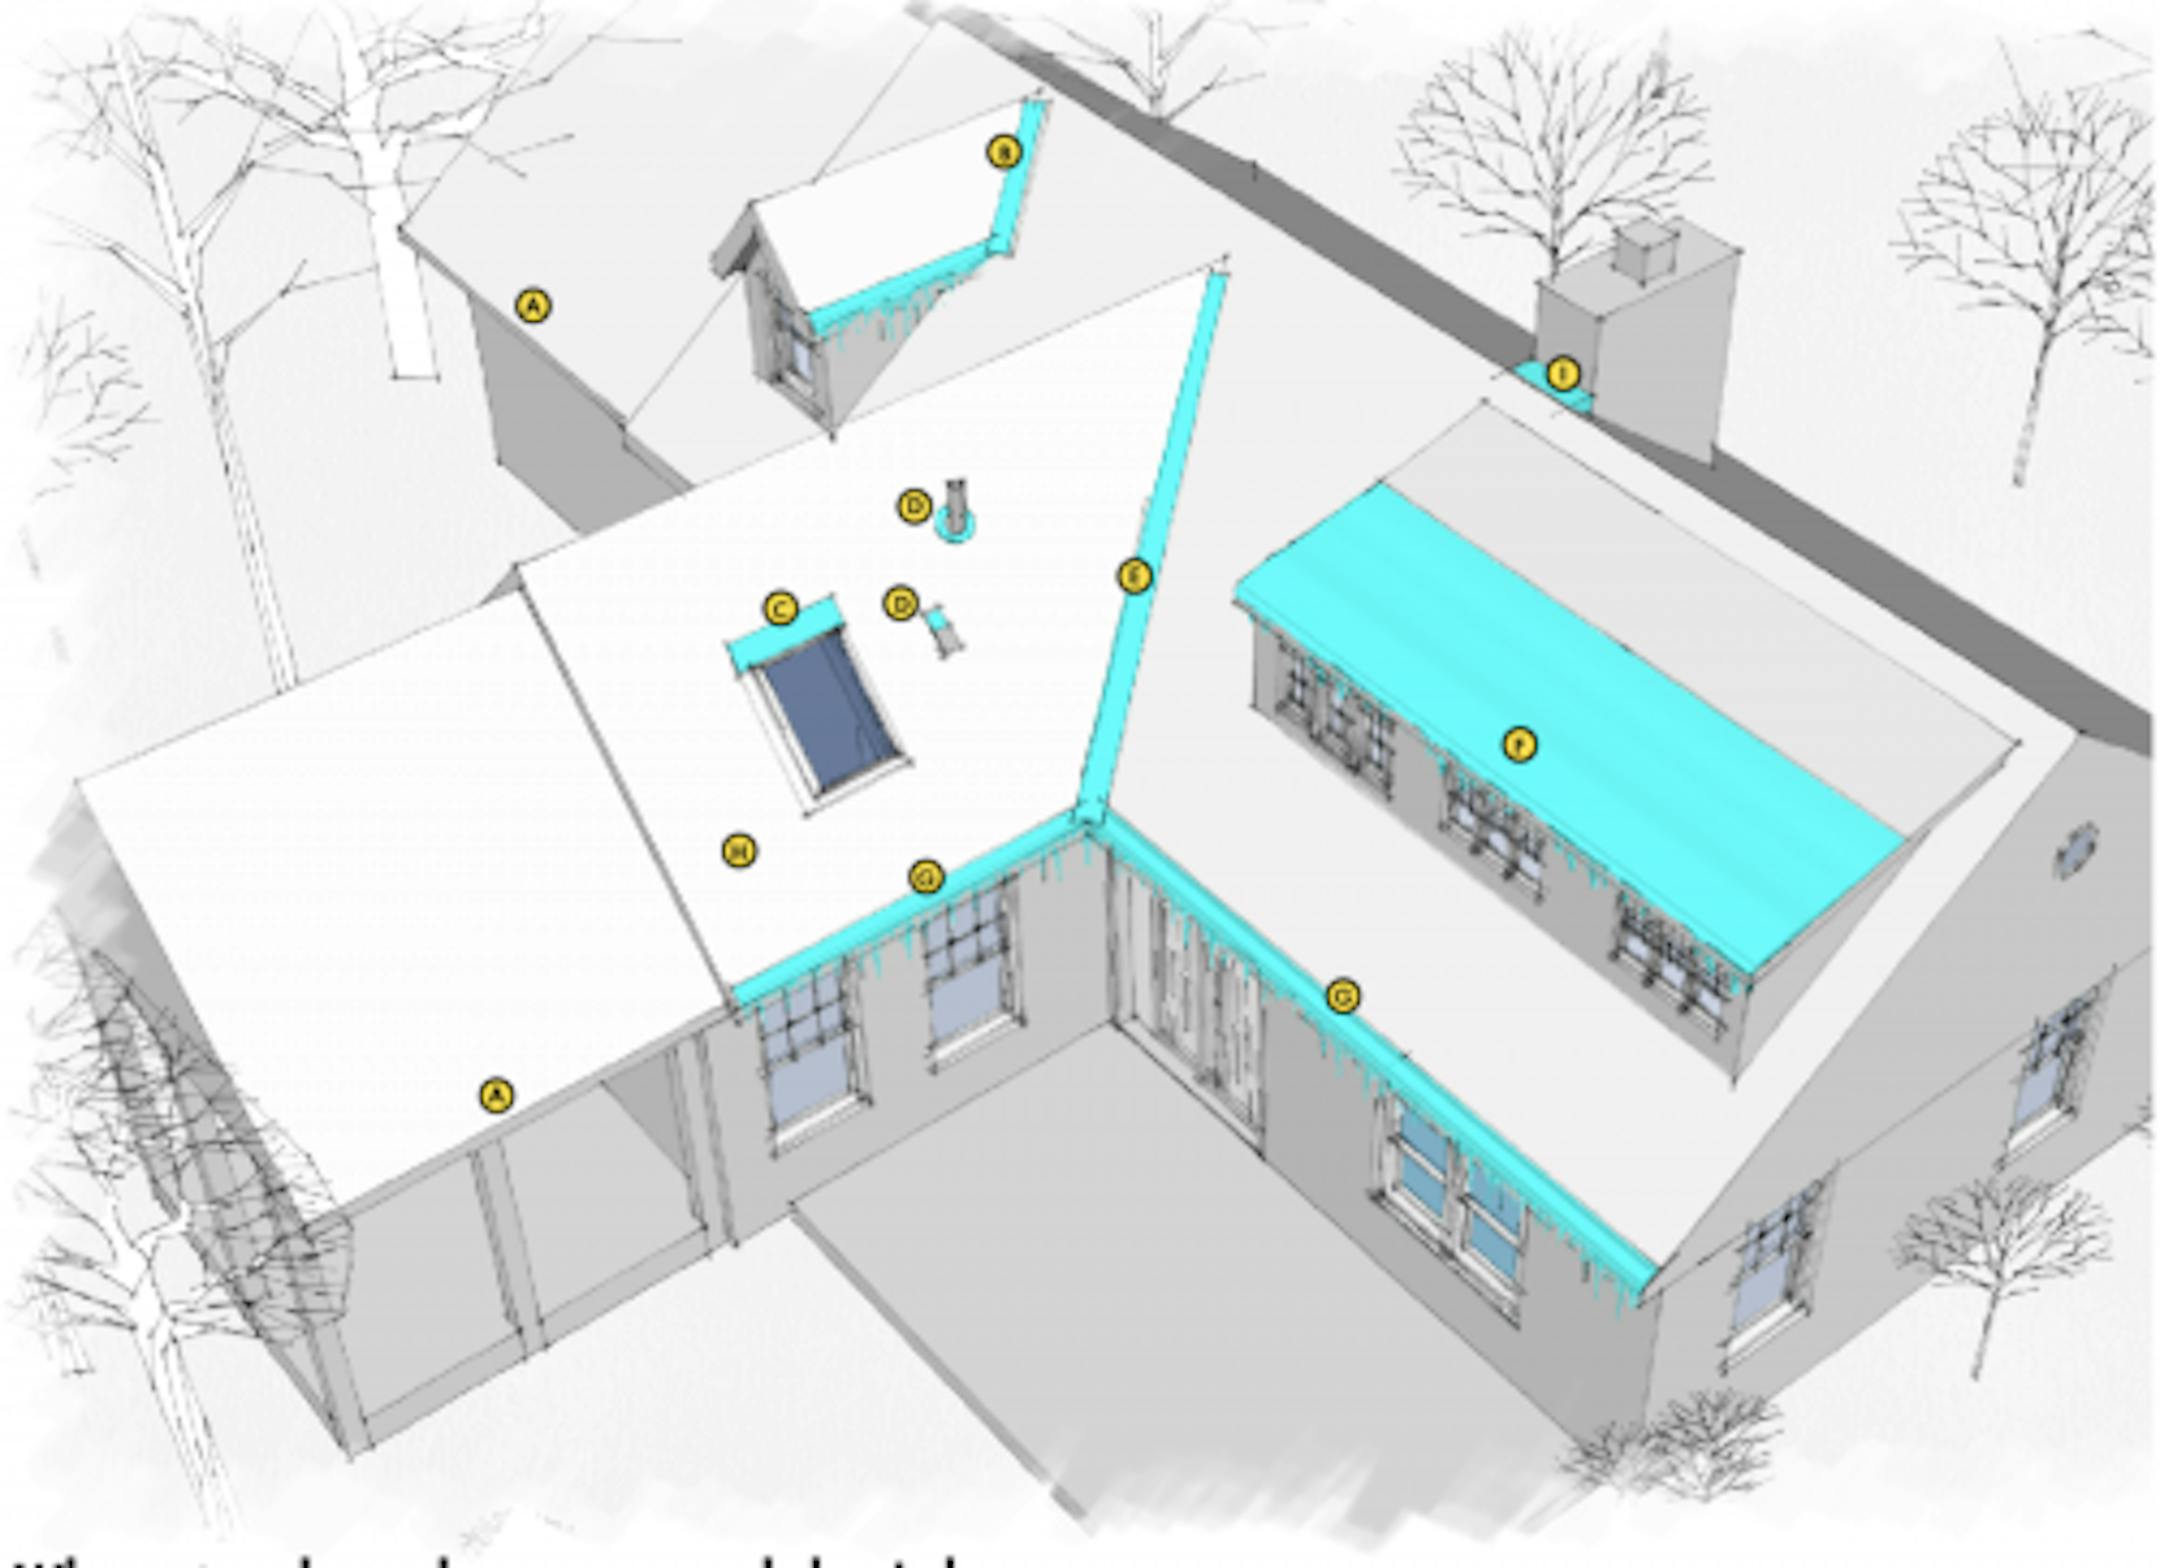
Ice dams are most often located on the lowest edge of the roof, commonly called the 'eave'. They are also found in other, sneakier places such as above skylights and low slope shed dormers. For the most part, the majority of the heat cable jobs we install involve treating the eaves and gutters. Running cable in the typical "zig-zag" pattern along the eaves of areas prone to ice dam formation will eliminate leaks from ice dams by melting paths through the snow and ice, giving water the opportunity to leave the roof.
Gutters and Ice Dams
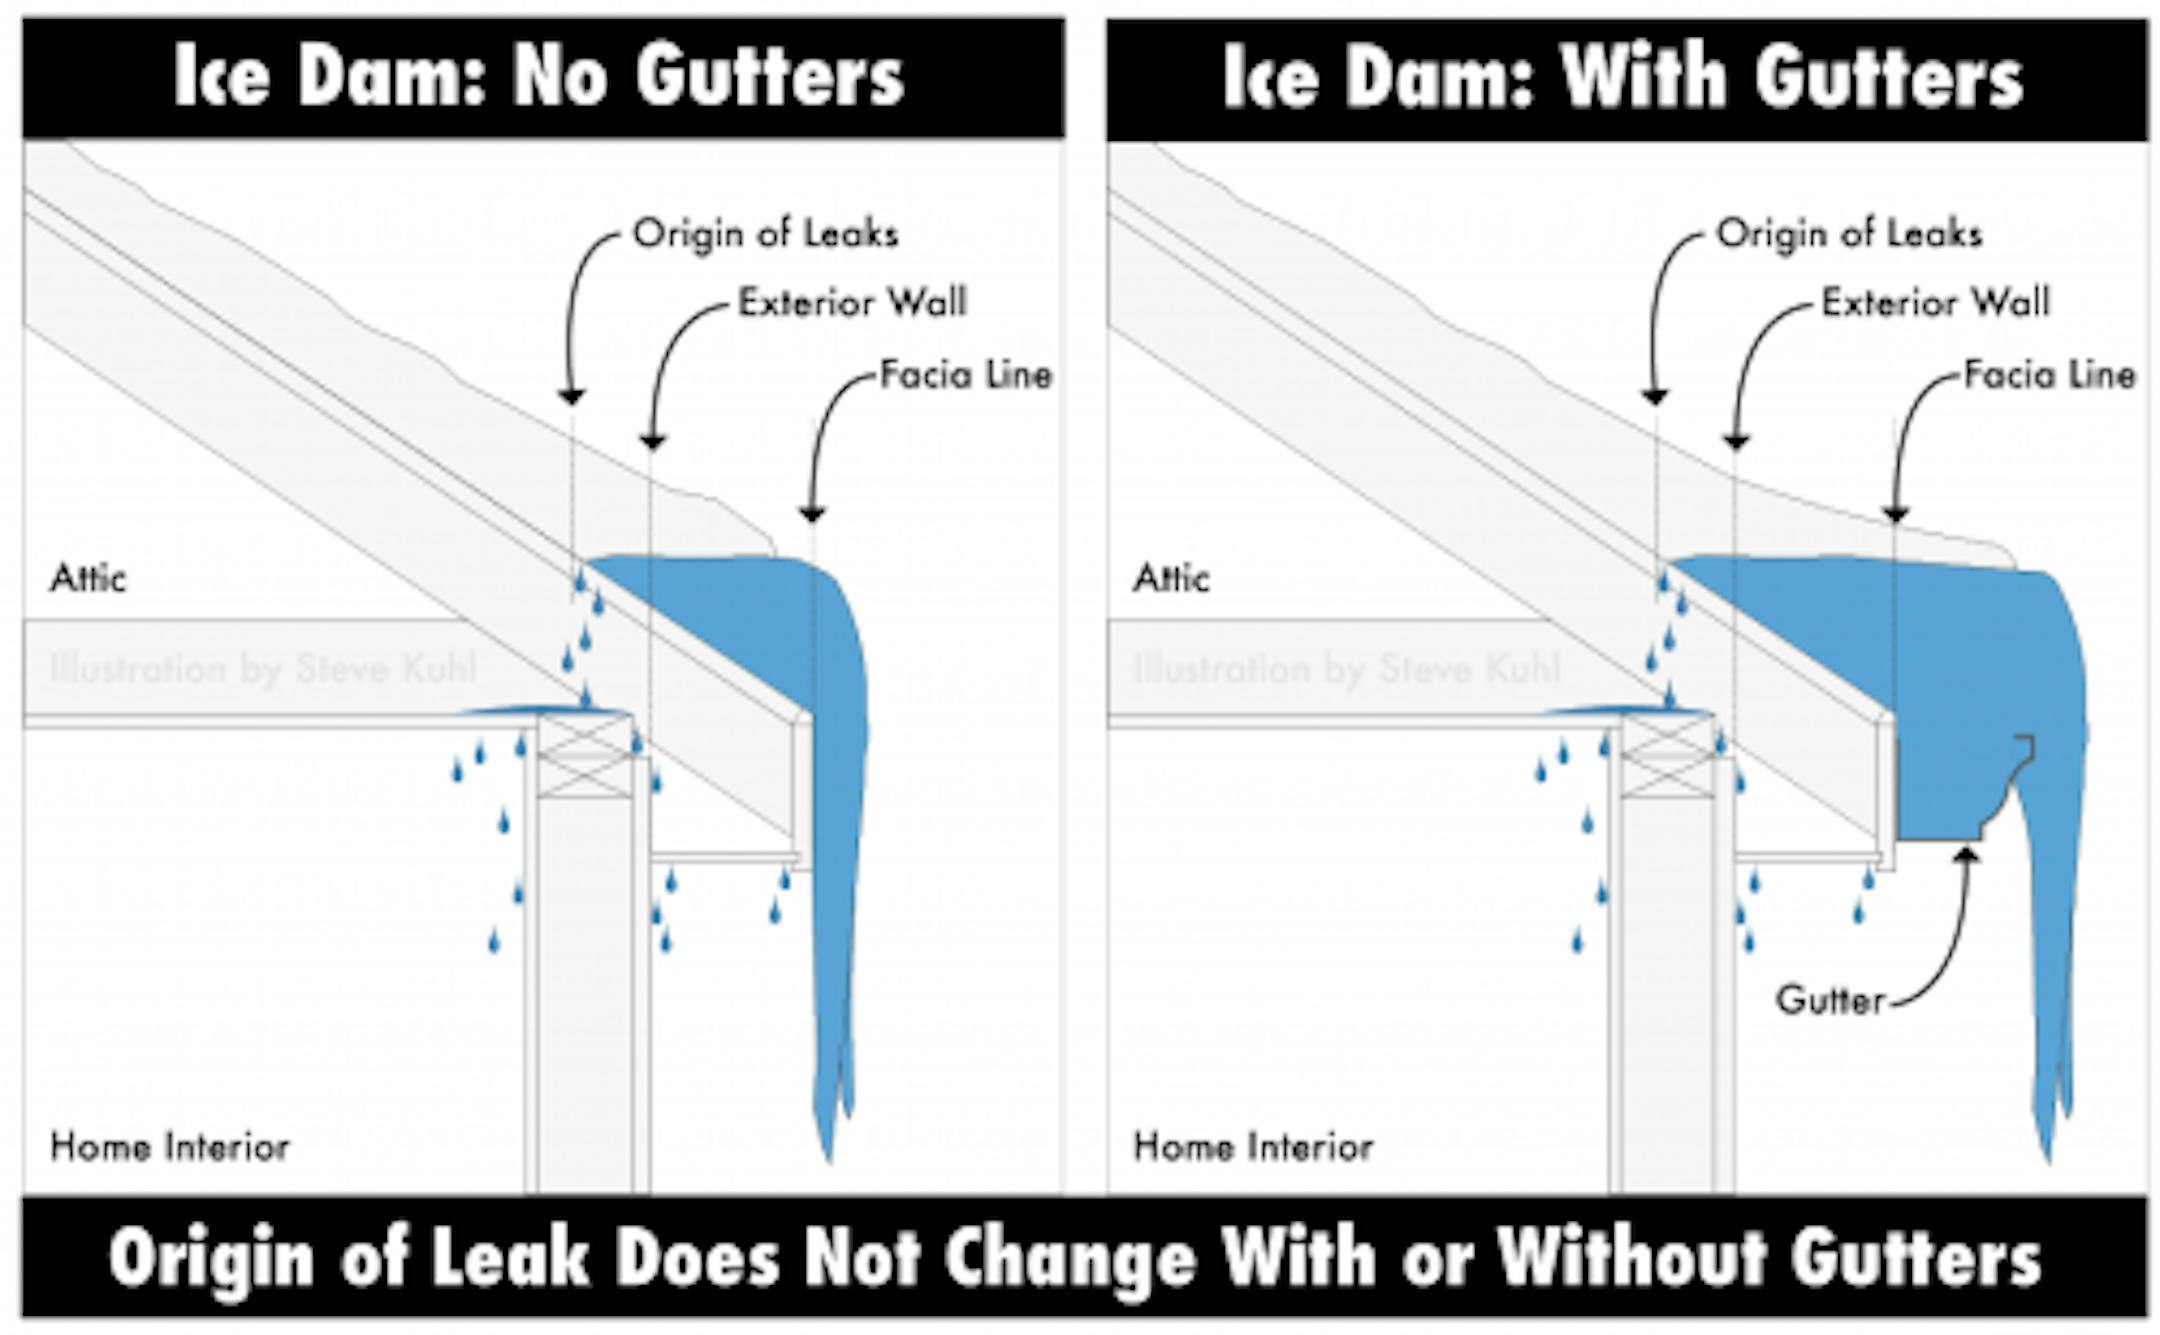
Speaking of gutters, I need to clear something up immediately. Gutters have NOTHING to do with the formation or severity of ice dams. Notice in the above illustration that the origin of the leaks caused by the typical ice dam does not change, with or without gutters. Put simply, if your home has bad ice dams and you have gutters, removing those gutters will have zero impact on the severity of those ice dams.
I know, because I have seen this attempted a number of times by desperate homeowners. Moreover, homeowners often make the mistake of thinking that installing heat cable in the gutters alone will help. It will not. Yes, it is smart to put heat tape in gutters to help water move off your roof and away from your foundation. No, installing cable in the gutters alone will not prevent damage to your home if ice dams visit.
How to Determine What You Need for a Roof and Gutter Heat Cable System
The simplest way to figure out the parts and pieces needed for your heat cable system is to plug in a few pieces of basic information into an online Heat Cable Calculator. Measure the length and depth of your eave. If you have gutters and a valley, plug in that info as well. No special skills or knowledge are required; just answer a few basic questions. The heat tape calculator will immediately tell you the cable length you need in addition to the number of heat cable roof clips required. It's that easy. You can use this information to purchase any self-regulating heat cable system you like.
Which Heat Cable to Use for Ice Dam Prevention
As I described in great detail in Part Two of my ice dam prevention series, there are only two classes of heat cable one can use for ice dam prevention: Constant Wattage (Sold under the brand names EasyHeat, Frost King, King and Prime), or Self-Regulating (Sold under the brand names Heat Tape Pro, Raychem and Thermon). We install Heat Tape Pro exclusively, but Raychem Winterguard is another excellent self-regulating heat cable our installers have used in the past. To a large extent, it doesn't matter which cable system you use as long as it is self-regulating and made by a reputable company. The limitations of constant wattage systems far outweigh their only advantage, cheap prices.
Roof Clips for Heat Cable System
The type of clip you will use for your roof and gutter deicing system will depend on the roof material on your home. The vast majority of heat cable is installed on standard asphalt shingles making the roof clip choice simple. The Grip Clip is the clip we use for all of our installations because it eliminates the need to drive nails or screws through your roof system. It also installs in about three seconds without the use of tools. We still use traditional nail-on clips for the installation of heat cable on rubber and metal roofs. Installers apply a dot of adhesive to the back of each clip before securing it with a nail or screw. We allow the adhesives to fully cure before installing the heat cable, a process that can take a few days or weeks depending on variables such as the roof material and the outdoor temperatures.

